Wheatpasting 101
Posted: August 31st, 2022 | Author: ucdcoc | Filed under: Disorientation Guide '22-'23 | Comments Off on Wheatpasting 101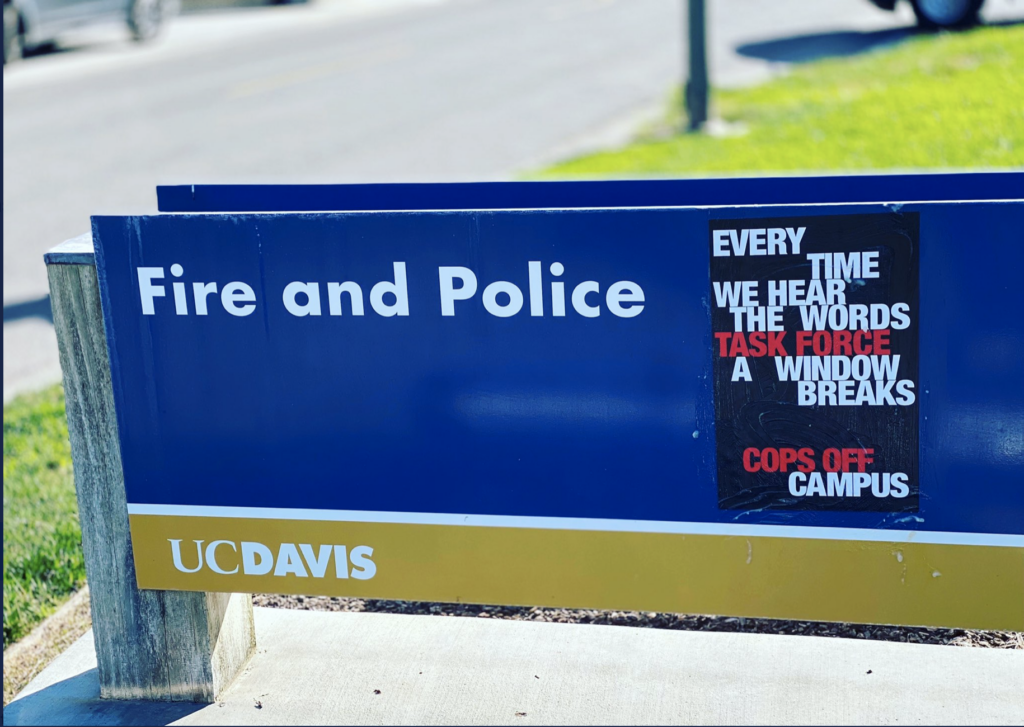
How To Put Up Fliers Pretty Much Anywhere: Wheatpasting 101
Wheatpasting is an easy, cheap way of getting your message/ideas out there in a publicly visible way that doesn’t conform to state sanctioned modes of creative and political expression. Plus it’s pretty fun, as long as you don’t get caught. The possibilities are endless in terms of messaging, so get creative! Feel free to use alongside *other* tactics of subversion and disruption and make sure to roll with a tight crew of homies you trust.
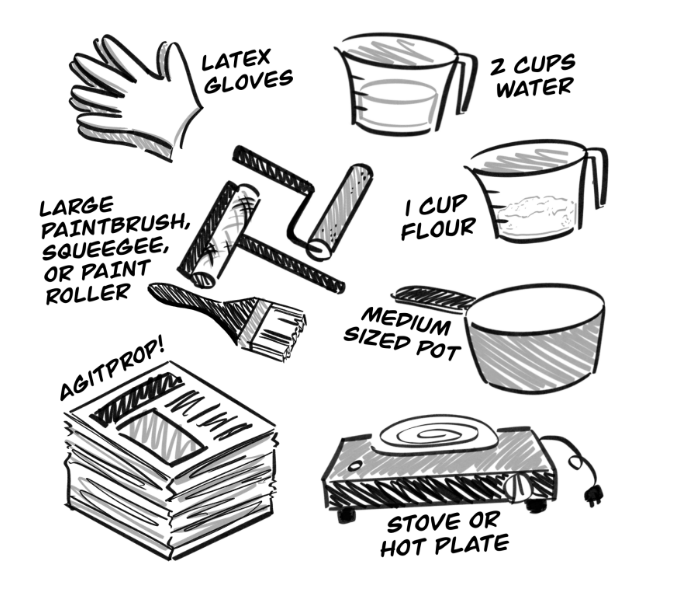
The Recipe
- 1 cup flour
- 2 cups water
- Stove or hot plate
- Medium sized pot
- A large paintbrush, squeegee, or paint roller
- Agitprop: flyers or posters (any size, but thinner paper is preferred — make sure they are legible and eye-catching!)
- Latex gloves
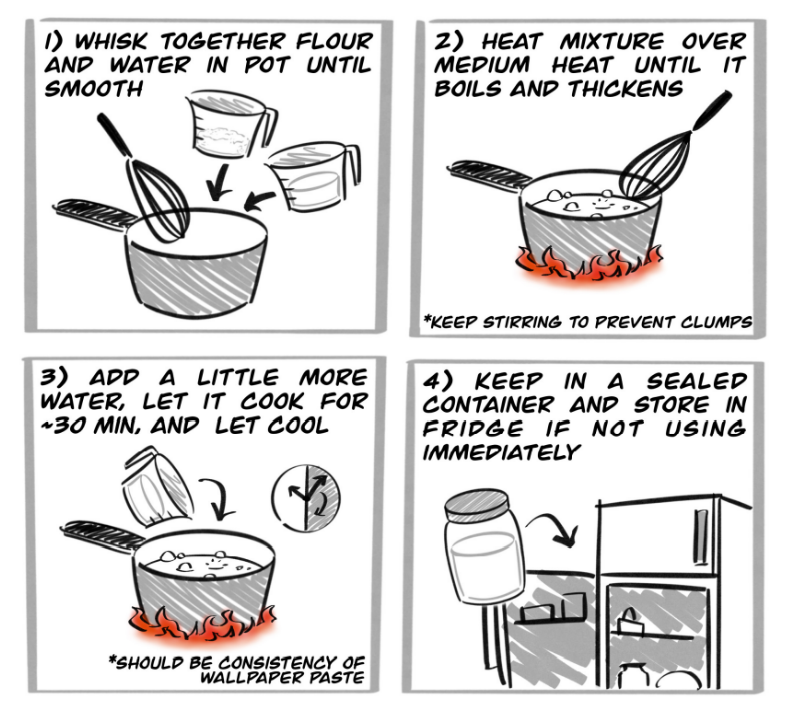
Directions
- Whisk together the flour and water in the pot until smooth (no lumps).
- Heat the mixture over medium heat until it boils and thickens (keep stirring to prevent clumping).
- Add a little more water and let it cook for around half an hour, and then let it cool. It should be about the consistency of wallpaper paste.
- Make sure to keep in a sealed container and store in the fridge if you aren’t using it immediately
Making It Happen
- Best to do this under cover of night, but you could also get creative and do it daytime in hardhats and safety vests or something. Make sure to have someone on lookout.
- A large-mouthed water bottle is ideal for transporting and applying the paste.
- In terms of placement, smooth metal, glass, or stucco surfaces are ideal (it will not adhere well on wood and concrete). Remember: more paste means longer drying, so plan accordingly. A messenger bag is helpful for quick access to posters/flyers.
- For smaller posters: using the minimum amount of paste, smear some paste on the surface, apply the poster (making sure to smooth out any air bubbles), and then apply some more paste to the front to secure it to the surface. Focusing on the edges will help keep them from peeling off.
- For larger posters: unroll on ground, smearing a small amount of paste on the back; then smooth out on the wall and finish with another layer of paste on top to firmly adhere it.
This article, including text and illustrations, was written by our friends at Abolish the UC and published in their 2020 Disorientation Guide.